April 29, 2008

Romano-Briton helm: part I


Hello everyone,

I received a commission for a Romano-Briton ridge style helmet. I've spent an hour and a half so far, and already finished the browband:


and formed and fitted two of the four top plates:


It's getting easier to make these things, so it's taking less time. I'm working more on it tomorrow, and hopefully I can get a good amount done, since I have finals in a week.

Until then,


April 27, 2008

Circular pouch: part I


Good day,

In the last week, I started work on a leather pouch similar in shape to one found in Hedeby, Denmark. Instead of the 9" diameter of the original, I made mine 14", as I need to be able to fit a cellphone within it.

Here's all the leather remaining of the original seven square feet. It's now down to about three.


Then I cut out the circle, decreasing the remaining leather to about two.


I then poked holes around the edge (squint and you can see them); also shown is the awl I used.


And a closeup:


Then came the hard part. I soaked the leather for a couple of minutes, and threaded string and wire through the holes. I pulled the pouch shut, and worked the folds into shape. I forced the edges as flat as possible. Then, I opened it up and took the back end of my awl, and flattened all the folds manually. Then I closed it back up to dry.


It took about 36 hours for the open parts to dry, and about 72 for the folds, once I opened them up to the air.

More later as I add the belt strap and drawstrings.


April 23, 2008

Valsgärde 6 helm: part III

Part 1 | Part 2 | Part 3

My customer sent me pictures of the Valsgärde helm I sold him in action. Here's the best one, in my opinion:


If you want to see the others, click on the above picture to visit the album.

Peter Koby

Part 1 | Part 2 | Part 3

April 19, 2008

Viking trousers: part I


Finally, another project. That's what comes from having little homework.

These trousers aren't based off of any extant piece in particular, but I did use this pattern for the general idea.

First off, here's the fabric I chose to use. It is 100% wool flannel.


Here I cut out the pieces, and already pinned one ready for sewing.


Here's the completed leg seam, from the inside,


and the outside.


I will sew all the seams thus, although it's quite difficult, really.

Next comes the other leg.


April 9, 2008

Viking helm: part X

Part 1 | Part 2 | Part 3 | Part 4 | Part 5 | Part 6 | Part 7 | Part 8 | Part 9 | Part 10

Hello all,

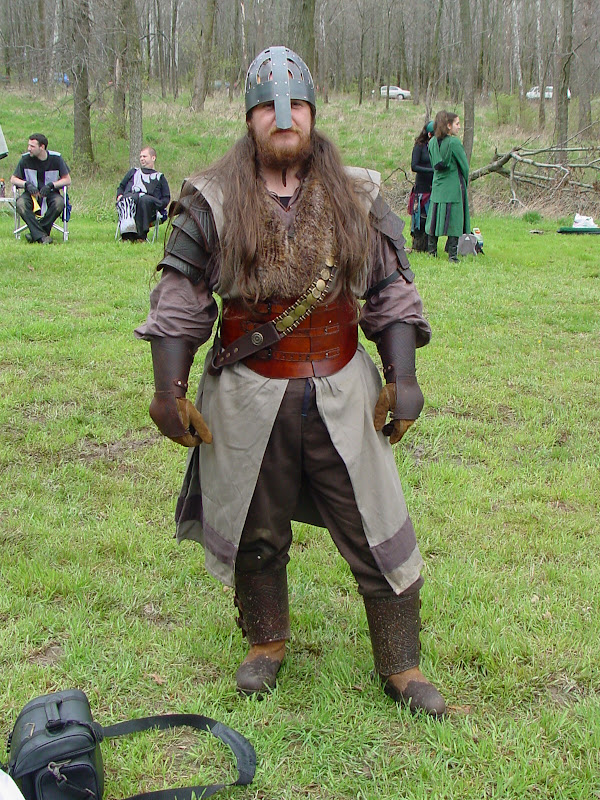
Well, it's complete. I finished the helm a couple weeks ago, but it took me a while to add the chinstrap, and far be it from me to call something finished when it is only virtually so. Also, the pictures here following are far better than the previous few, and show better the overall look.


I made the buckle myself as well, from a piece of coat hanger wire, and a bit of 16 gauge wire for the tongue.

At the moment I have virtually no projects I am currently working on. I am finishing up a seam on my medieval shirt, and I recently finished my braies (pictures will follow in time), but I haven't started anything from scratch.

However, I have a number of projects that I will work on: hosen, trousers, another Viking helm, eventually Viking shoes. That's just the stuff for which I already have the materials.

Anyway, until next project,

Peter Koby

Part 1 | Part 2 | Part 3 | Part 4 | Part 5 | Part 6 | Part 7 | Part 8 | Part 9 | Part 10

April 3, 2008

Viking shield: part III


Hello,

My Viking shield is finished. Here are the pictures:

This is the back of the shield:


And this is the front.


Until next time.