Showing posts with label accessories. Show all posts

July 29, 2009

Shoes


Hello,

This pair of shoes was an interesting project. I made the first shoe months ago, found it didn't fit, and dropped the project. Now, I wanted to finish the pair to sell it, but I had lost the second sole. I had to reconstruct the sole for the second shoe with careful measurements of the first.

Here they are:


Note the decorative stitching. This was based off of examples of herringbone stitch found on extant shoes.


They are currently still for sale, so if you're interested, they are a size 8.5 men's. Email me for more info.

June 22, 2009

Dagger sheath: part II


Hello,

Here are the final images of the sheath. I dyed it with a medium brown dye, utilizing the new technique of wetting the leather before application, which made for a smoother finish (the technique is new to me, anyway).


I intend to post a few more photos once I finish rebuilding the dagger.

June 19, 2009

Dagger sheath: part I


Hello,

I am back after a long dry spell making hardly anything. Now that my summer vacation is over, and my summer classes have started up, I've started making things again (that's how it always is).

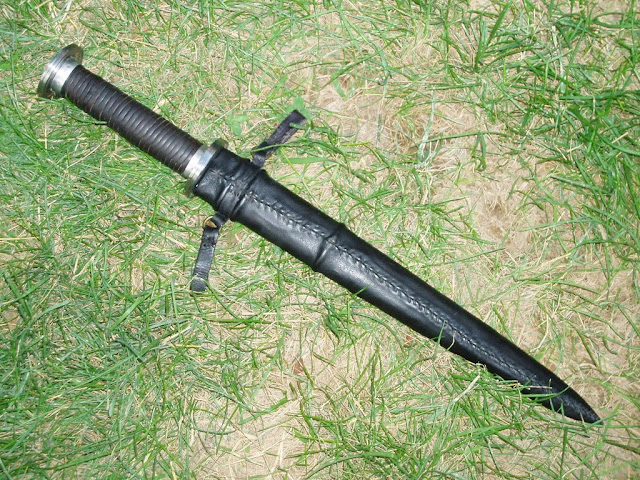
You may recall seeing the previous dagger sheath I made (
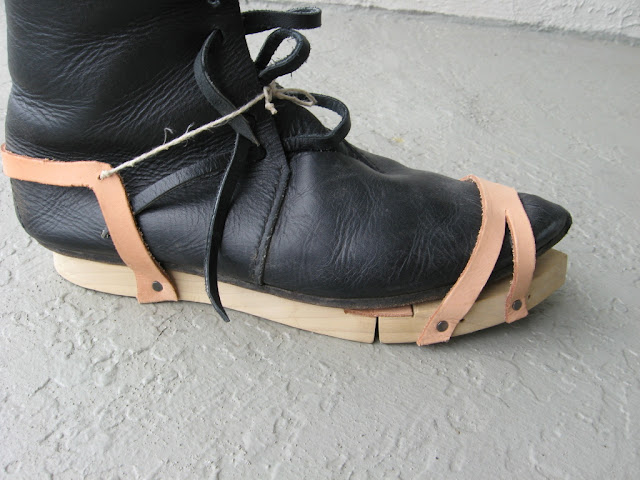
here). While I wish to create more costume pieces for this year's renaissance fair, I have at the moment no materials to do so, so for the time being, I have been searching for things to modify.

My dagger was originally very obviously intended for live steel combat, but I modified it to make it sharp and pointy. I also made the sheath for it, but I based it off of sword scabbards, and as such it was not very accurate.

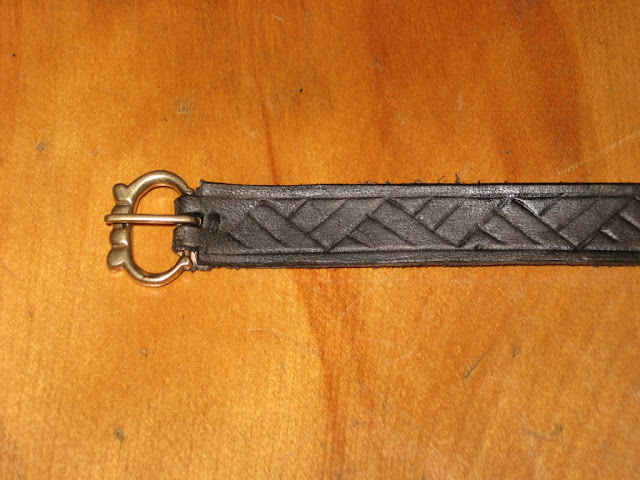
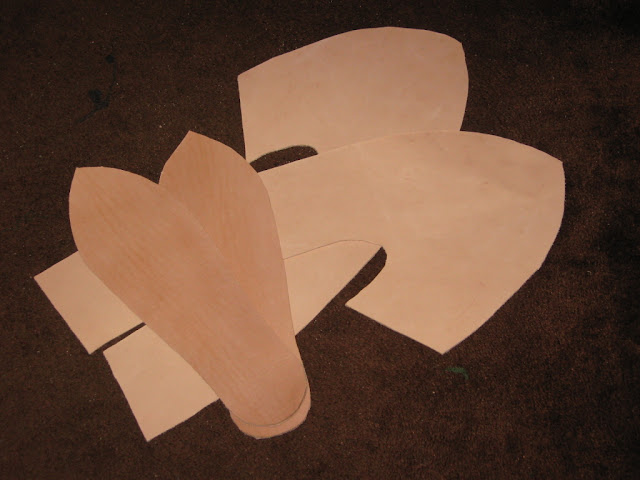
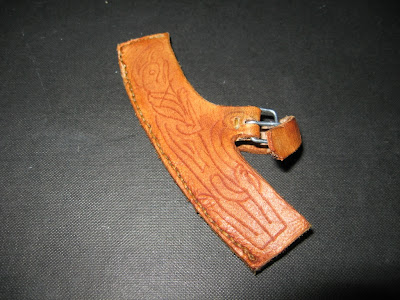
This new one is solely leather, without a wooden core. This is (according to MyArmoury.com articles) accurate. I also used the book "Knives and Scabbards" to inspire me in terms of decoration.

This is the front, showing the simple knotwork I tooled into it (disregard the mistake, if you can even find it...).


And this is the back, showing the edge-grain stitch I used, as well as the holes for the string to suspend it from my belt.


As to suspension, if anyone knows a good way to hang a sheath with this setup, please let me know.

Best regards,

October 6, 2008

Dutch shoes: part II


Hail,

These shoes are finally receiving my attention, after more than a month of neglect (school...). Well, I'm nearing completion of one of the pair. I've finished the sole-to-upper seam, and have started the heel stiffener.

Here it is, pre-turned:


And here it is, moist, stuffed with a piece of cloth after turning.


Until next time, then,

October 5, 2008

Lady's belt


Hwæt!

This project was swift and secret, as it was a gift for my sister's birthday. I bought the buckle from Thorthor's Hammer, waited about a week, then started working. I cut out the belt based on the width of the buckle (½"), cut out the buckle area, then sewed on the buckle. I then moistened the belt and tooled a simple pattern into it. I dyed it black, and packed it up.

Here are pictures:


Till tomorrow,

October 1, 2008

Saex sheath


Hello,

This project was made for my friend's birthday (back in early July), but I just finished it. It's leather, dyed with diluted dark brown. Actually, it's the same dye as on my other sheath, just well-diluted.


It's actually more streaky than the picture shows. That picture is actually surprisingly beautiful.

Till next time.

September 14, 2008

Whetstone


Hello people,

It hit me the other day that there is one thing a Viking warrior oughtn't be without which I had somehow neglected to have. A whetstone, obviously, comes in quite handy to hone the axes, knives and saexes the Viking may have. Since I have a total of three bladed implements on my costume this year, I kind of need a sharpening device.

So I went to the river, which was handily low, and wandered around in the dusky light looking for something suitable. Eventually I found a triangular rock of what seems to be a shale or something. I got home, and drilled a hole in one corner, surely dulling my bit at the same time. I threaded it and playtested it. It hones my knife so sharp that it is quite effortless to cut loose paper.

And you didn't think I wouldn't take pictures, did you? (Mind, I generally only post when I have three or more, unless the object's finished. So you know.)


Just something to whet your appetite...

August 30, 2008

Dutch shoes: part I


Hello everybody!

I'm back! It's been over two weeks since I've last posted, which I can blame mostly on two things:
a) I'm lazy, and I haven't been working on more than one project at a time.
b) School started, and I've been studying for the first time ever.

Now that I'm back in 'the groove', I've started working on my latest project, which is a pair of shoes, based off of this example. It's a commission, and the person purchasing has a Dutch persona, thus the Dutch shoes.

I started with the basic pattern used on my last pair of shoes (here), only sized up to a size 15 (!).

Here are the four pieces cut out:


Here is the first shoe after a good bit of sewing:


And here is a very bright picture trying to demonstrate the detail of the stitching:


I intend to take some pictures of the finished product with a size comparison, so you can get an idea just how big these things are (no offense, Thomas Z.).

I would also like to mention just how loyal my visitors are; over the past couple weeks, I've averaged at least 20 visitors a day. Last time I stopped posting, it only averaged about nine. Thanks, guys.

August 4, 2008

Viking belt


Good day!

I'm back in business, at least until school starts Aug. 25. This project was a bit of a short deal. I didn't make the buckle set. I bought it from Raymond's Quiet Press. Excellent work for great prices.

Anyway, I dyed the belt myself, and attached the buckles. Not too impressive, to be sure.


Till next project,

July 24, 2008

Horn Spoon


Hello,

To be totally honest, I did not make this, per se. The spoon was ready-made, and I simply took a drill, a saw, and a number of files to it.


Thanks for looking.

July 16, 2008

Pattens


Well come,

This is an interesting project, as I've had the pair for over a year and never had a reason to wear them. The renaissance fairs I've visited since I finished them have been either too dry, or I was wearing a different costume at the time.

I'm still quite proud of them, as I think they look quite accurate, down to the 'rustic' nails.


Till next time,

July 15, 2008

Viking hat


Hail,

This hat was a spur-of-the-moment project. I had some scrap from a tunic I made, and I could barely fit eight panels onto the pieces I had. I then decided to use the mink fur I had to edge the hat.

It's extremely warm. I think it's too warm for Ohio winters, even.


Till tomorrow,

July 14, 2008

Arm ring


Greetings,

This project has been an ongoing thing since last fall. I bought some 8 gauge brass wire, twisted it into a simple 'rope', and called it finished. About a month ago, I experimented with steel wire, and figured out that I could make it look more detailed without any trouble. Then, I bought some cap nuts, ground off the hexagonal bit, and soldered the finished pieces onto the ends of the ring.

This is the result, for a total cost of about $5 and one hour.


Till next time,

July 13, 2008

Dagger sheath


Good day,

Today's project is a sheath for a dagger I bought. I did not make the dagger, but I did modify it. It came as a live steel dagger, with thick edges and a large, blunt tip. I ground them down to a realistic shape.

The sheath is made with a wooden core, wrapped with thin leather which is glued then sewn.


Until tomorrow,

July 6, 2008

Viking shoes 2: part II


Good day,

I'm finally back. I got my new computer, and it's taken some time to get all my programs installed (not to mention, I've been playing many a game), and only today did I install my camera software.

Well, here are the final pics of the shoes I made. These were made using the leather from the first pair I made, about five years back, and simply modified to fit better.


And on my foot, to show how it fits:


I think the pair is done. I would like to do something on the top to tie it, or something, but haven't figured out the best solution for that.

Till next time,


June 25, 2008

Axe sheath


Hello,

So, I bought an axe, and since it's sharp, and I plan to take it to a renaissance fair, I made a sheath for it. I have no progress pictures, but I have finished ones.

Here you are:

Front:


Back:


Those are arbitrary front and back sides, which is why I tooled both sides. I just plan to have the 'front' facing out more often.