February 26, 2008

Viking helm: part IV

Part 1 | Part 2 | Part 3 | Part 4 | Part 5 | Part 6 | Part 7 | Part 8 | Part 9 | Part 10

Hello,

Because of a snow day, I had some free time, so I got to work some more on the helm. I cut out the rest of the top bands, but didn't do anything else to them:


I also started planishing, which is indeed quite the bore. I estimate it took about 45 minutes to completely planish one plate. Clearly, I didn't work non-stop, otherwise I would have finished all four plates. I only finished two and a quarter. Here's a picture before planishing:


And the same one after:


Here's part of the reason I didn't finish planishing: I was experimenting with rivets to find out how long I would have to cut them in order to make them uniform, and also testing my new rounding tool (a bolt with a divot in the end, which is used to hammer the peened end into a round shape). Here's a picture of the one I tested:


By the by, someone asked what gauge I was using; it is 16 gauge.

That is all. There isn't any more.

Until tomorrow,

James

Part 1 | Part 2 | Part 3 | Part 4 | Part 5 | Part 6 | Part 7 | Part 8 | Part 9 | Part 10

February 23, 2008

Viking helm: part III

Part 1 | Part 2 | Part 3 | Part 4 | Part 5 | Part 6 | Part 7 | Part 8 | Part 9 | Part 10

Salutations:

It will not look as though I did much today, but the amount of work greatly outweighs the number of pictures. I'll start by saying I finished the other two plates, which took a lot more tweaking. Then I pounded them against the wooden form, which worked quite well. Here you can see the four plates around the form, showing how they don't quite align on the edges. Still, it's good enough.


I then clamped all the pieces together, which looks slightly better, since the outside of the form is the same size as the inside of the brow band:


I could have started planishing the plates, but that takes forever, and is a bitch. So instead, I worked on the top bands, each 1" wide, and about 7.5" long. I cut out the first one, dished it slightly, and bent it into the approximate shape:


That's all I did today. Next time I shall cut out the other top bands, probably planish, and maybe, hopefully, start riveting. For the rivets, I plan to work them from the outside, and I will probably make a form for them so that I can smash them into a nice round shape on the outside. It will basically be a divot in a piece of rod. More on that when I make it.

My next post may be a week in coming, although I may work more on Wednesday. I also plan to purchase fabric tomorrow, so I might be working on hosen or trousers or what have you.

Until then,

James

Part 1 | Part 2 | Part 3 | Part 4 | Part 5 | Part 6 | Part 7 | Part 8 | Part 9 | Part 10

February 22, 2008

Viking helm: part II

Part 1 | Part 2 | Part 3 | Part 4 | Part 5 | Part 6 | Part 7 | Part 8 | Part 9 | Part 10

Good day:

I got some more work done on the helmet. I started making the top pieces, beginning by making a pattern out of tape, which I flattened, transferred to paper, and then to metal:


Then I cut them out:


I started dishing using a different hammer than I ever have before. Instead of using a ball peen as I usually do, I used a modified cross peen, which, although slightly large, worked a lot better. Here is the first section after the first pass:


And second pass:


And third/tweaking pass:


The hammer definitely worked. It took about half an hour to get to the above stage. I then made the second piece, and then tweaked the first to the same shape; that took a lot longer than the previous step. Then, I decided to cut the edges down (I did plan the pieces with extra), and tweaked some more. I think the first two are about the right shape now.


It's true what I said before: I did indeed curse out the pieces o' metal, for such reasons as the edges pinching my hand, not fitting, et cetera.

I plan to make the other two top pieces tomorrow. We'll see how much I curse then. Overall, the profile seems to be looking good. It's taller than I intended, but it doesn't seem to cause any problems.

Until then,

James

Part 1 | Part 2 | Part 3 | Part 4 | Part 5 | Part 6 | Part 7 | Part 8 | Part 9 | Part 10

February 21, 2008

Viking helm: part I

Part 1 | Part 2 | Part 3 | Part 4 | Part 5 | Part 6 | Part 7 | Part 8 | Part 9 | Part 10

Greetings:

I have acquired a camera, so now, finally, I can chronicle my projects with purpose.

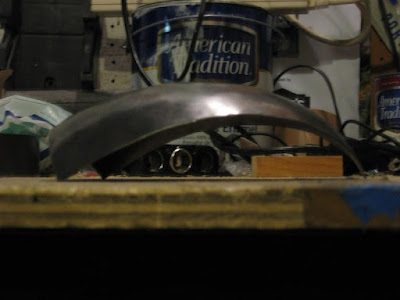
The first project I shall chronicle, from start to finish, is that of my third Viking helm. Below is a picture of my last helmet:


As you can see, it ended up rather bulbous on top, so it doesn't have the proper profile. The one I am making now shall be slimmer, more dainty, and better formed. I started out last night making a wooden form slightly bigger than my head. Here's the pattern for the base:


And drawn on wood:


Here are the top pieces' patterns and wood:


I cut those out with a saber saw, cut slots in the top pieces to fit them together, drilled holes in the base, and screwed all the pieces together. I didn't bother to finish the wood at all, since I plan to bend metal around it, and that's likely to mar it. So here's the finished product:


I spent a good long while playing with wire mesh, trying to make a head shape, and kind of succeeded (it did help me make sure the form was the right size), but the result was so ugly I'm not posting pictures.

I measured a strip of metal 1.5" wide by ~27" long for the brow band, cut it out, and filed and sanded the edges:


I offset one end the thickness of the metal so that when the ends overlap, they end up at the same level on the outside. Then, I bent the strip around the form, utilizing C clamps, pipe clamps, and brute force. It took far too much effort, but I got it to the right shape, and approximately oval, without too many anomalies. It ended up a little larger than the form, but on trying it on my head, it seems to be the right size.

Here it is, clamped together, as it isn't yet riveted:


And here's a top view, showing that it is mostly oval:


I did change it after to round it out slightly more, so it looks better now. If you can't see that it isn't off, call me crazy. I can't see it anymore either.

The next installment will involve, in all likelihood, me cursing out bits o' metal, since I shall be forming the top plates, which always annoys me. That doesn't mean that my next post will be more helm pictures. I may post pictures of other, finished projects, or, as materials permit, the beginnings of new projects.

Until then,

James

Part 1 | Part 2 | Part 3 | Part 4 | Part 5 | Part 6 | Part 7 | Part 8 | Part 9 | Part 10