May 7, 2013

English Longbow: Part 1

This project began with a conversation with a colleague. He and I were talking about what we would like to do for a living if any job, past or present, was on the table. He and I both wanted to be smiths of one sort or another (he wants to make swords, I want to make armour). Stemming from that, I mentioned thinking of getting into hunting, and we both wished to be able to shoot a simple longbow (rather than a compound). That thought stuck in my head for a couple weeks until I gave in and picked up some wood at Home Depot.

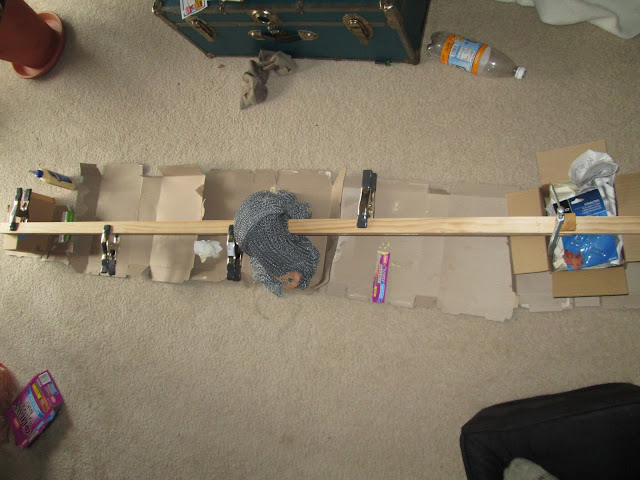
I used red oak for the belly of the bow and white pine for the back. I laminated them together:


I surely could have used more clamps, but I didn't want to spend an arm and a leg on this project (more on that later). I weighed it down in the middle with my hauberk (15 pounds) to give a little bit of reflex.

Here it is glued up. You can see how there is a little bit of flex towards the pine side (the left).


After it was glued, I marked out the rough shape and cut it out with a handsaw (oak is not easy to cut). Take note: I started this project on 4/20, and only finished the rough cutting about ten days later. Then came tillering. This is as far as the bow would bend at 50 pounds (my target weight) before any shaping.


The first day of shaving it down did not make a huge difference. I bought a Surform tool to help things along (which is amazing, by the way), and things got a little quicker. In the course of this project, I spent about $12 on wood for the bow itself, and probably about $40 on tools. It's an investment, though.

This is on 5/1:


5/3 at 9:15 am. Notice I have gone from a leather-tipped long string to a string that is close to the actual length of the finished string.


2:15 pm. I have gotten the tips of the bow to meet the brace height.


5/4. I tightened the string to brace height (the middle of the string about 6" from the bow).


By 11:08 am, I got the bow to full draw at 50 pounds.


After all the heavy bending, the bow did take some set towards the oak side, but as you can see below, it only took about one inch. Given that the bow started reflexed in the opposite direction, this amount of set is not too severe.


The bow is almost complete. I need to add horn or antler nocks on the ends and make it a bowstring. I've already sanded it nice and smooth and given it a coat of beeswax and tallow.

Once I get it finished and strung (and make or find some arrows), I'll take some pictures of it in use.

April 19, 2013

The Resurrection of the Dormant Passion

Greetings one and all.

I've found the time to craft again, so expect to see some pictures again soon. Lots has happened in the past three and a half years, but I've found my way back to handiwork.

I am a graduate student, so I reserve the right to post infrequently. Here's hoping this isn't one of those "I'll post more" then nothing posts. I have some crafts started though.

Here's a teaser:


If you know what that is, you'll understand the direction I'm going.

July 29, 2009

Shoes


Hello,

This pair of shoes was an interesting project. I made the first shoe months ago, found it didn't fit, and dropped the project. Now, I wanted to finish the pair to sell it, but I had lost the second sole. I had to reconstruct the sole for the second shoe with careful measurements of the first.

Here they are:


Note the decorative stitching. This was based off of examples of herringbone stitch found on extant shoes.


They are currently still for sale, so if you're interested, they are a size 8.5 men's. Email me for more info.

July 14, 2009

Splinted armour


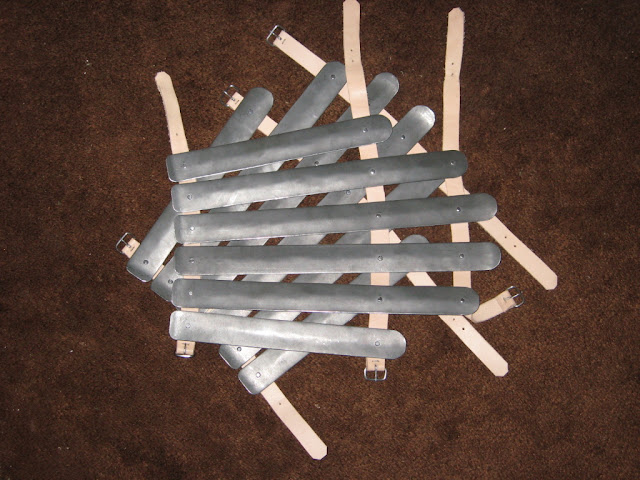
Good day,

This project was a commission, and I wasn't planning on posting any pictures at all, but I do love the look of this one.


June 29, 2009

Dagger sheath: part III


Hello,

Here, finally, are the pictures of the dagger itself.


And yes, those are hollow rivets:


June 22, 2009

Dagger sheath: part II


Hello,

Here are the final images of the sheath. I dyed it with a medium brown dye, utilizing the new technique of wetting the leather before application, which made for a smoother finish (the technique is new to me, anyway).


I intend to post a few more photos once I finish rebuilding the dagger.

June 19, 2009

Dagger sheath: part I


Hello,

I am back after a long dry spell making hardly anything. Now that my summer vacation is over, and my summer classes have started up, I've started making things again (that's how it always is).

You may recall seeing the previous dagger sheath I made (here). While I wish to create more costume pieces for this year's renaissance fair, I have at the moment no materials to do so, so for the time being, I have been searching for things to modify.

My dagger was originally very obviously intended for live steel combat, but I modified it to make it sharp and pointy. I also made the sheath for it, but I based it off of sword scabbards, and as such it was not very accurate.

This new one is solely leather, without a wooden core. This is (according to MyArmoury.com articles) accurate. I also used the book "Knives and Scabbards" to inspire me in terms of decoration.

This is the front, showing the simple knotwork I tooled into it (disregard the mistake, if you can even find it...).


And this is the back, showing the edge-grain stitch I used, as well as the holes for the string to suspend it from my belt.


As to suspension, if anyone knows a good way to hang a sheath with this setup, please let me know.

Best regards,

February 16, 2009

Viking Pendant


Greetings and long time unseen!

Recently I celebrated a birthday, and my grandfather sent me a clipping from a magazine with a picture of a Viking warrior. I admit only glancing at it, but when I picked it up a few days later, the warrior's necklace caught my eye.


I had been dabbling in bonework over the past couple weeks, so I decided to undertake this project on a whim. I did most of the hardest work in a couple sittings, aided greatly by House M.D. After the basic shape was sawn from the antler, I paused, as I hadn't a small enough drill bit for the hole.

Today, I bought said drill bit, drilled the hole, did the final decoration, then cut the pendant from the antler and finished up the end. And here it is:


October 8, 2008

Sword in the stone


Hello,

I thought it fitting to post this, as it does have something to do with both the Middle Ages and crafts. I made this project in Jewelry/Metals class at Kent State University (quite a fun and useful class, despite my low grade).


October 7, 2008

Splinted greaves: part IV


Hei!

They're done. Here are some pictures. I don't have to tell you much, because it's all the same as I have been doing.